Part 0: Intro, Part 1: Auth and Part 2: CRUD and Part 3: Notification
Introduction
In this part, we will create a CI/CD process using AWS tools. There are a few AWS services for that:
- CodeBuild - continuous integration service.
- CodeDeploy - deployment service.
- CodePipeline - continuous delivery service.
To remind you about the Waitlist application, we have multiple lambda functions:
- Auth - Authentication, Authorization and Registration.
- CRUD - Waitlist and Waitee.
- Notification - Producer and Consumer.
In total, 7 lambda functions that ideally should be built, deployed and tested together.
Pipeline[0]
We start with creating a pipeline for our application.
Open AWS console then go to CodePipeline tool and press on Create pipeline button.
There are multiple steps to do, and I will try to provide the most important details.
Step 1: Choose pipeline settings
- Pipeline name => Enter
WaitlistApp. - Service role => We would create a new service role with
WaitlistAppPipelineRolename, but there is also an option to use an existing role. - Artifact store => Choose
Default location. Also, we have an option to an use existing S3 bucket.
Step 2: Add source stage
A few options are available as a source: GitHub, S3, CodeCommit, ECR. We could also add multiple sources to our pipeline.
- Source provider => Select
Github. After we would connect to our Github account with OAuth then select Repository =>WaitlistAppAuthLambdasand branch =>master. - Change detection options => Choose
GitHub webhooks (recommended). Different approach is to set CodePipeline to periodically check our repository.
Step 3: Add build stage
- Build provider => Select
AWS CodeBuild. - Region => Select your region, almost all are available.
- Project name => Press on
Create projectbutton.
Build
A separate window is opened to create AWS CodeBuild project for our pipeline build stage.
There are multiple sections with a few properties each that we should specify.
Project configuration
- Project name => Enter
WaitlistAppAuthLambdas.
Environment
For the Environment image we have 2 options:
- Managed images - a few predefined
WindowsandUbuntubased withGolang,Java,Node.jsand other languages and things. - Custom images - also,
WindowsandLinuxbased fromAmazon ECR(Image registry from Amazon) and Other registries.
As we’re using Serverless Framework to build an application and Golang for the lambda function
we need docker container with Go tools and Node.js which has npm to install the serverless framework.
Unfortunately, there is no image like this, so we should create a custom one and upload it to Amazon ECR.
The easiest way to create custom image is to combine existing dockerfiles from both Golang and Node.js images in aws-codebuild-docker-images repository on Github.
After we push over image to ECR we should set a few permissions for CodeBuild to be able to access our image.
Set of permissions is specified in user guide for ECR sample in documentation - Step 3.
Now we’re ready to fill this section:
- Environment image => Select
Custom image. - Environment type => Choose
Linux. - Image registry => Select
Amazon ECR. - ECR account => Select
My ECR account. - Amazon ECR image => Choose
latestor your version. - Image pull credentials => Select
Project service role. - Service role => Select
New service role - Role name => Enter
codebuild-WaitlistApp-service-role
Buildspec
We have 2 options here:
Use a buildspec file- file should be located in our source (Github repo).Insert build commands- write content of thebuildspeccommand in editor.
I would suggest to write it in the editor first to make sure it works and after commit to the repository.
We have next buildspec.yml for our project:
version: 0.2

phases:
  install:
    commands:
    - npm install --silent --progress=false -g npm
    - npm install --silent --progress=false -g serverless
    - npm install --silent --progress-false
    - npm --version
  pre_build:
    commands:
    - mkdir -p ../github.com/korest/WaitlistAppAuthLambdas
    - mv * ../github.com/korest/WaitlistAppAuthLambdas
    - mv ../github.com .
    - cd github.com/korest/WaitlistAppAuthLambdas
  build:
    commands:
    - make deploy
  post_build:
    commands:
    - echo Build completed on `date`
installphase has the serverless framework install commands.pre_buildphase has the workaround to makego depwork because of this issue.buildphase has command frommakefile which does build, test and deploys with serverless framework.post_buildjust prints the date when the build completes.
Logs
- CloudWatch logs => Check it.
Optionally we could define
CloudWatchgroup and stream names.
Pipeline[1]
Step 4: Add deploy stage
After we press Create project in CodeBuild we are redirected back to our pipeline creation process.
Skip deploy part as we’re using the serverless framework for the build process and it deploys our lambda functions.
Create pipeline
Let’s proceed with creating pipeline.
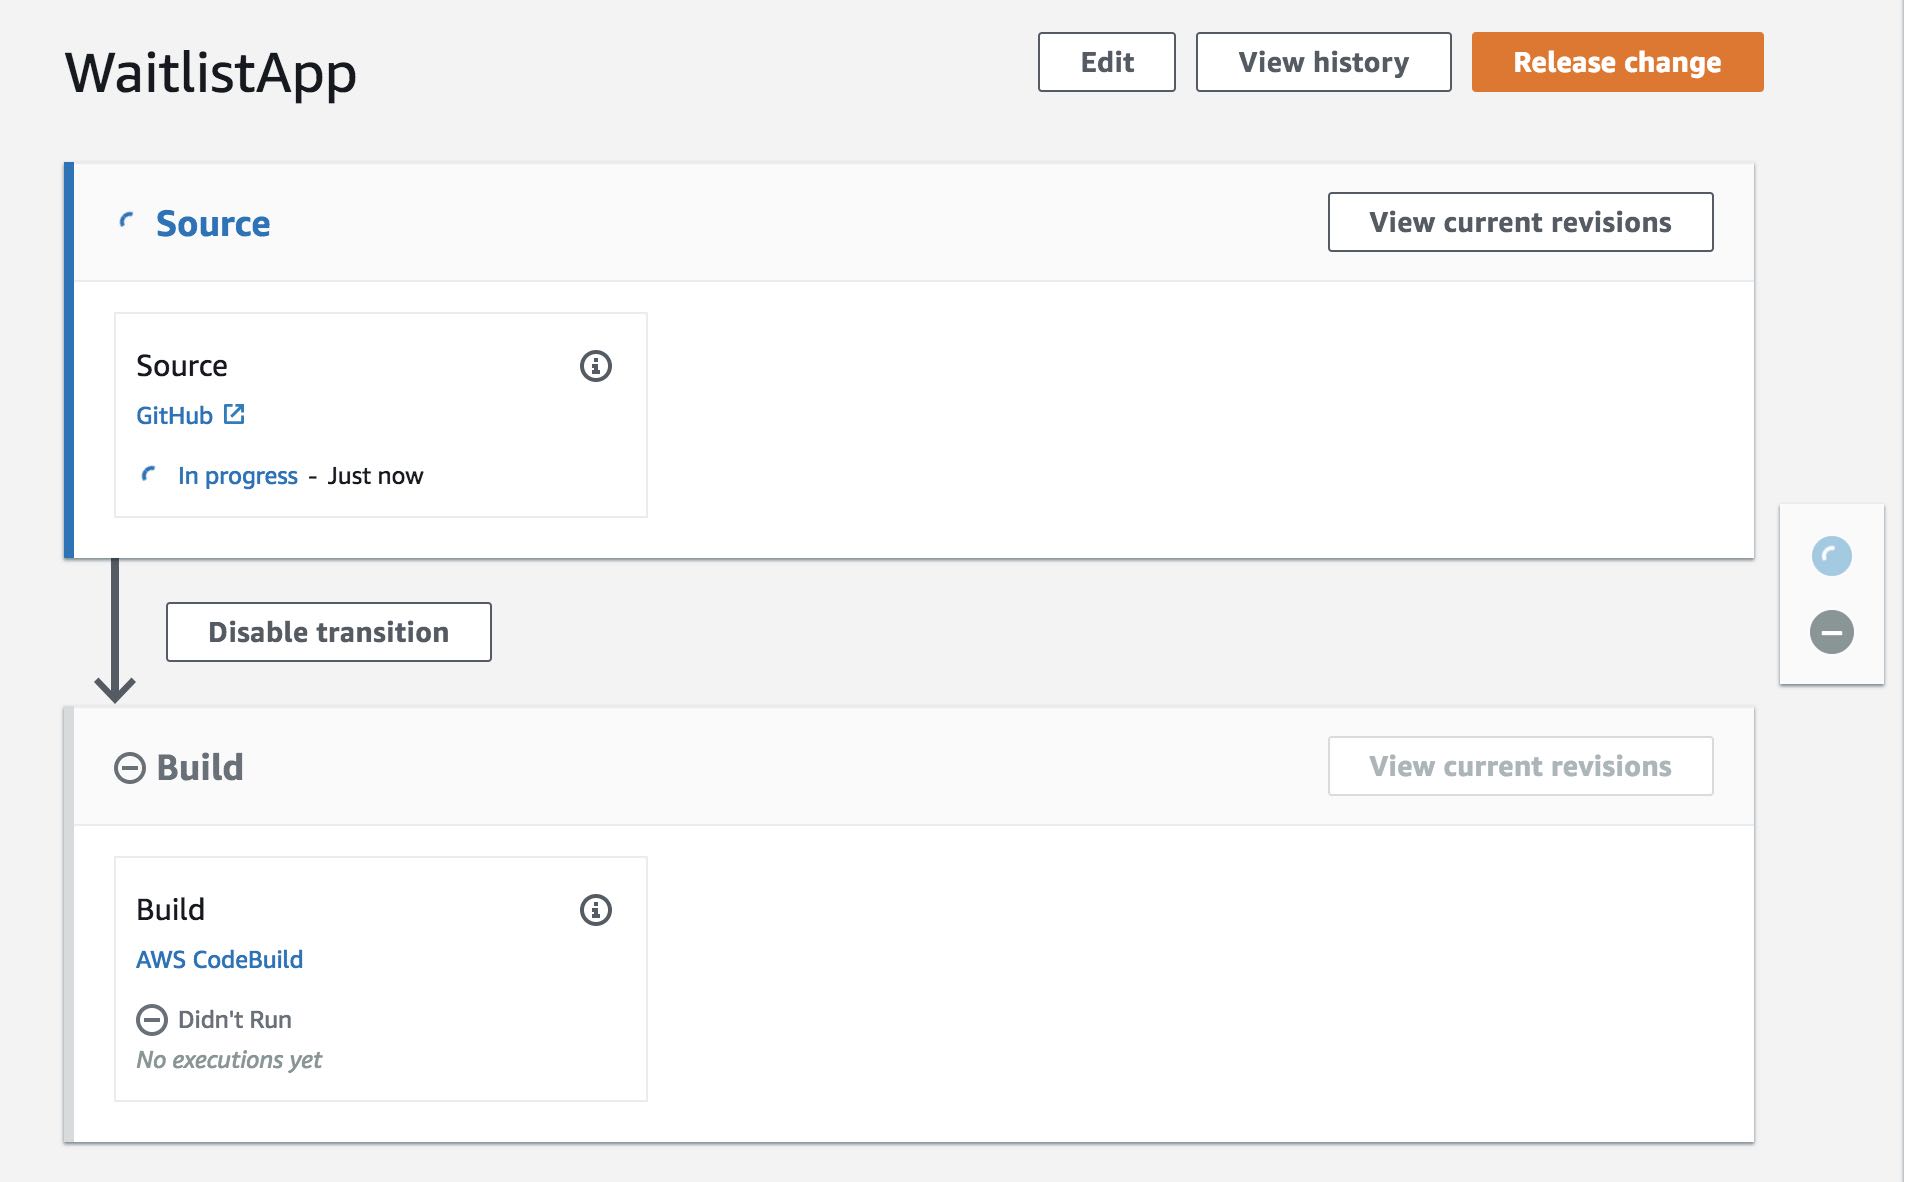 We can see configured
 Source and Build parts for Auth lambdas.
If we press on AWS CodeBuild from the pipeline we would see CodeBuild project details page.
There we have Build History with details for each build like Status, Project, Duration etc.
If we press on one of Build runs we would see details about it like Build status, Build configuration and Logs.
Also, we could see logs in real time when the build is being ran.
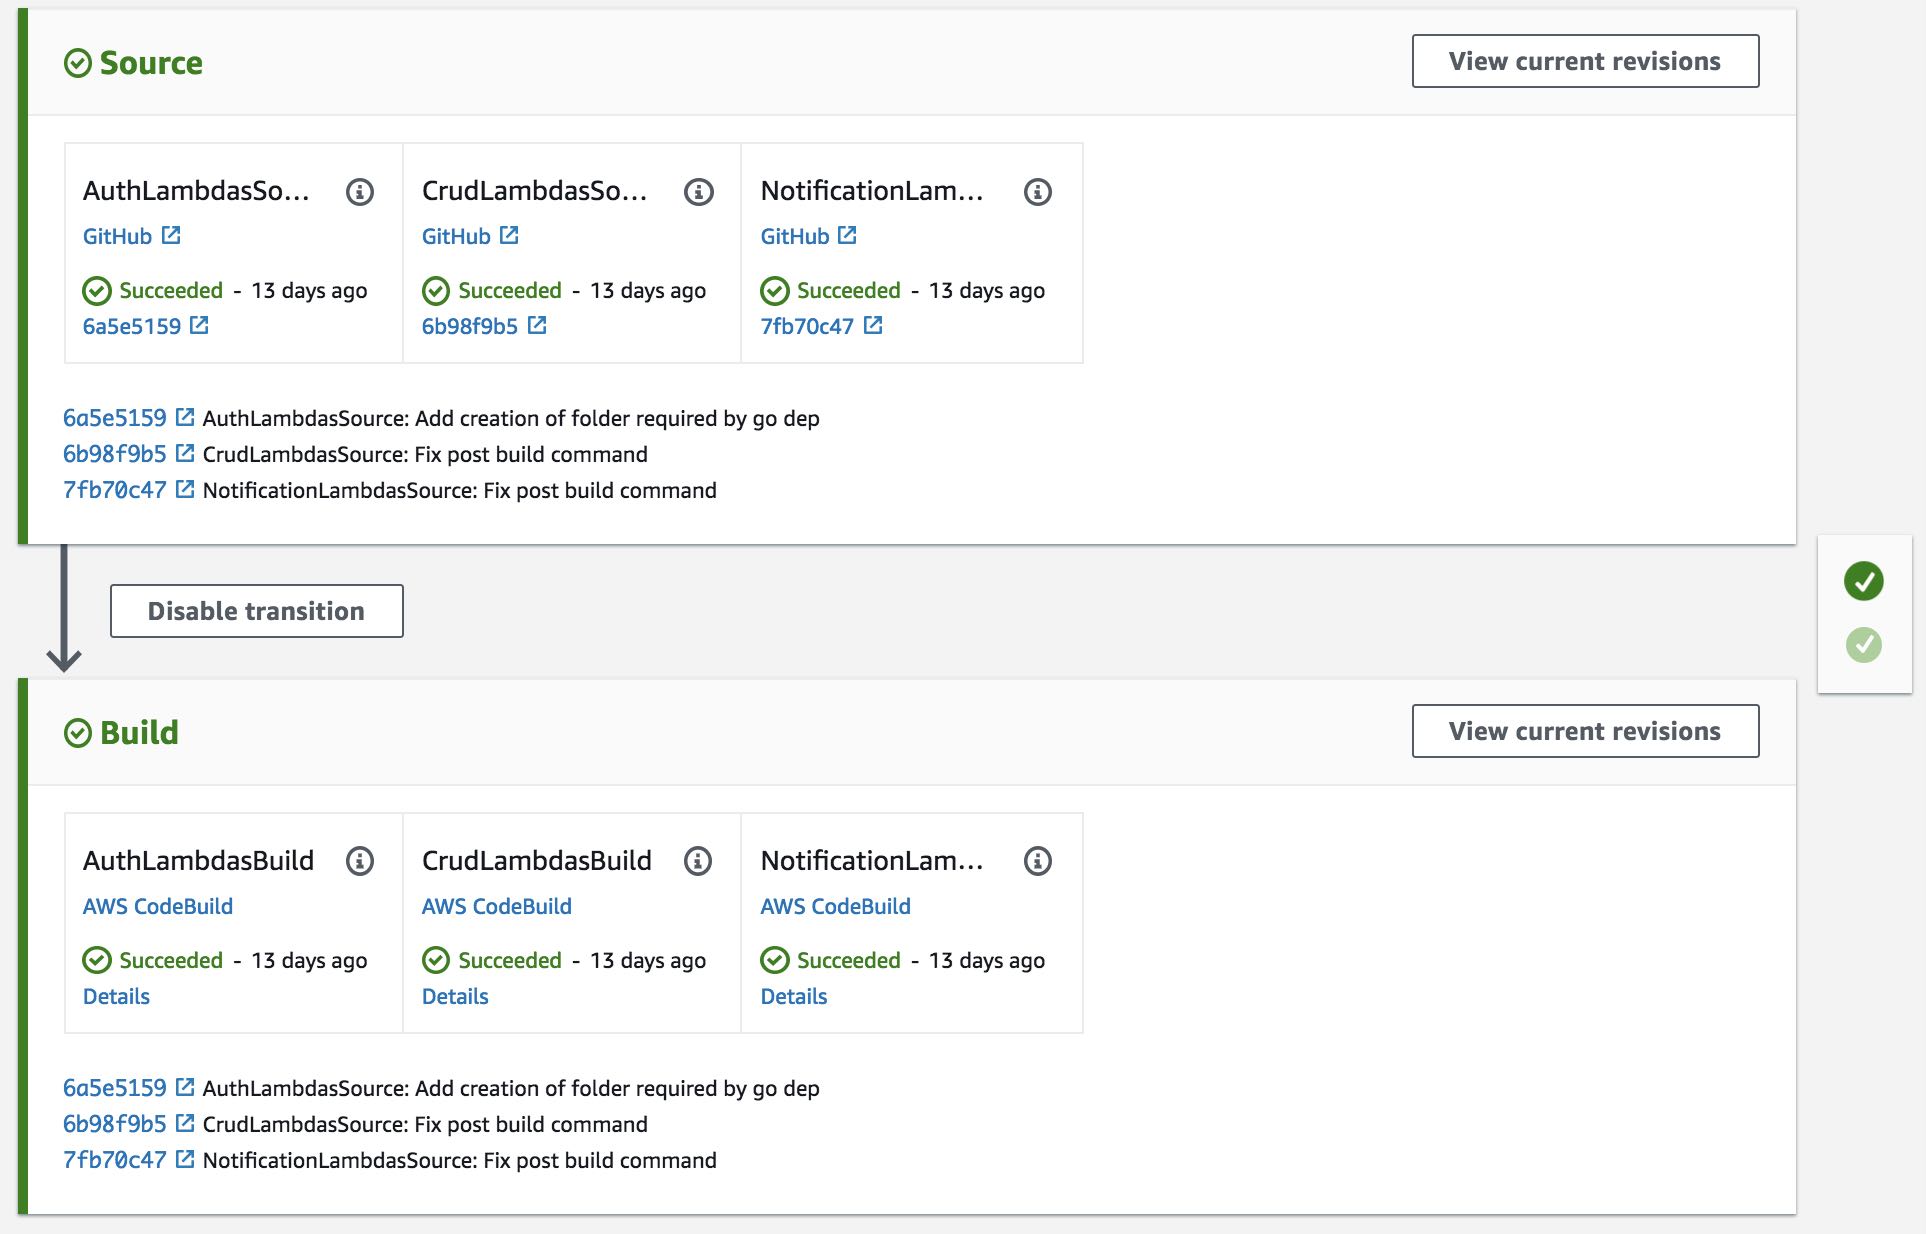
I’m not going to provide configuration details for CRUD and Notification lambda functions as it similar to this one, but finally, our pipeline would look like:
Conclusion
We created a simple pipeline for our WaitlistApp which deploys everything to a single account.
In a real use-case scenario, we would probably want to deploy to multiple stages/accounts.
There are a few blog posts and documentation articles that could help us with this:
- Building a Secure Cross-Account Continuous Delivery Pipeline.
- Using AWS CodePipeline to Perform Multi-Region Deployments.
- Four stage pipeline.
Also, there is a possibility to define pipeline in JSON format which makes move to other accounts/regions very simple.
Using Git repository we can control deploy to different stages with Git branches and have separate pipeline per account.
For example, dev account pipeline has dev branch as a source and as final step commits changes to gamma branch with executing AWS lambda, after a pipeline from gamma account runs and as final step commits changes to prod branch.